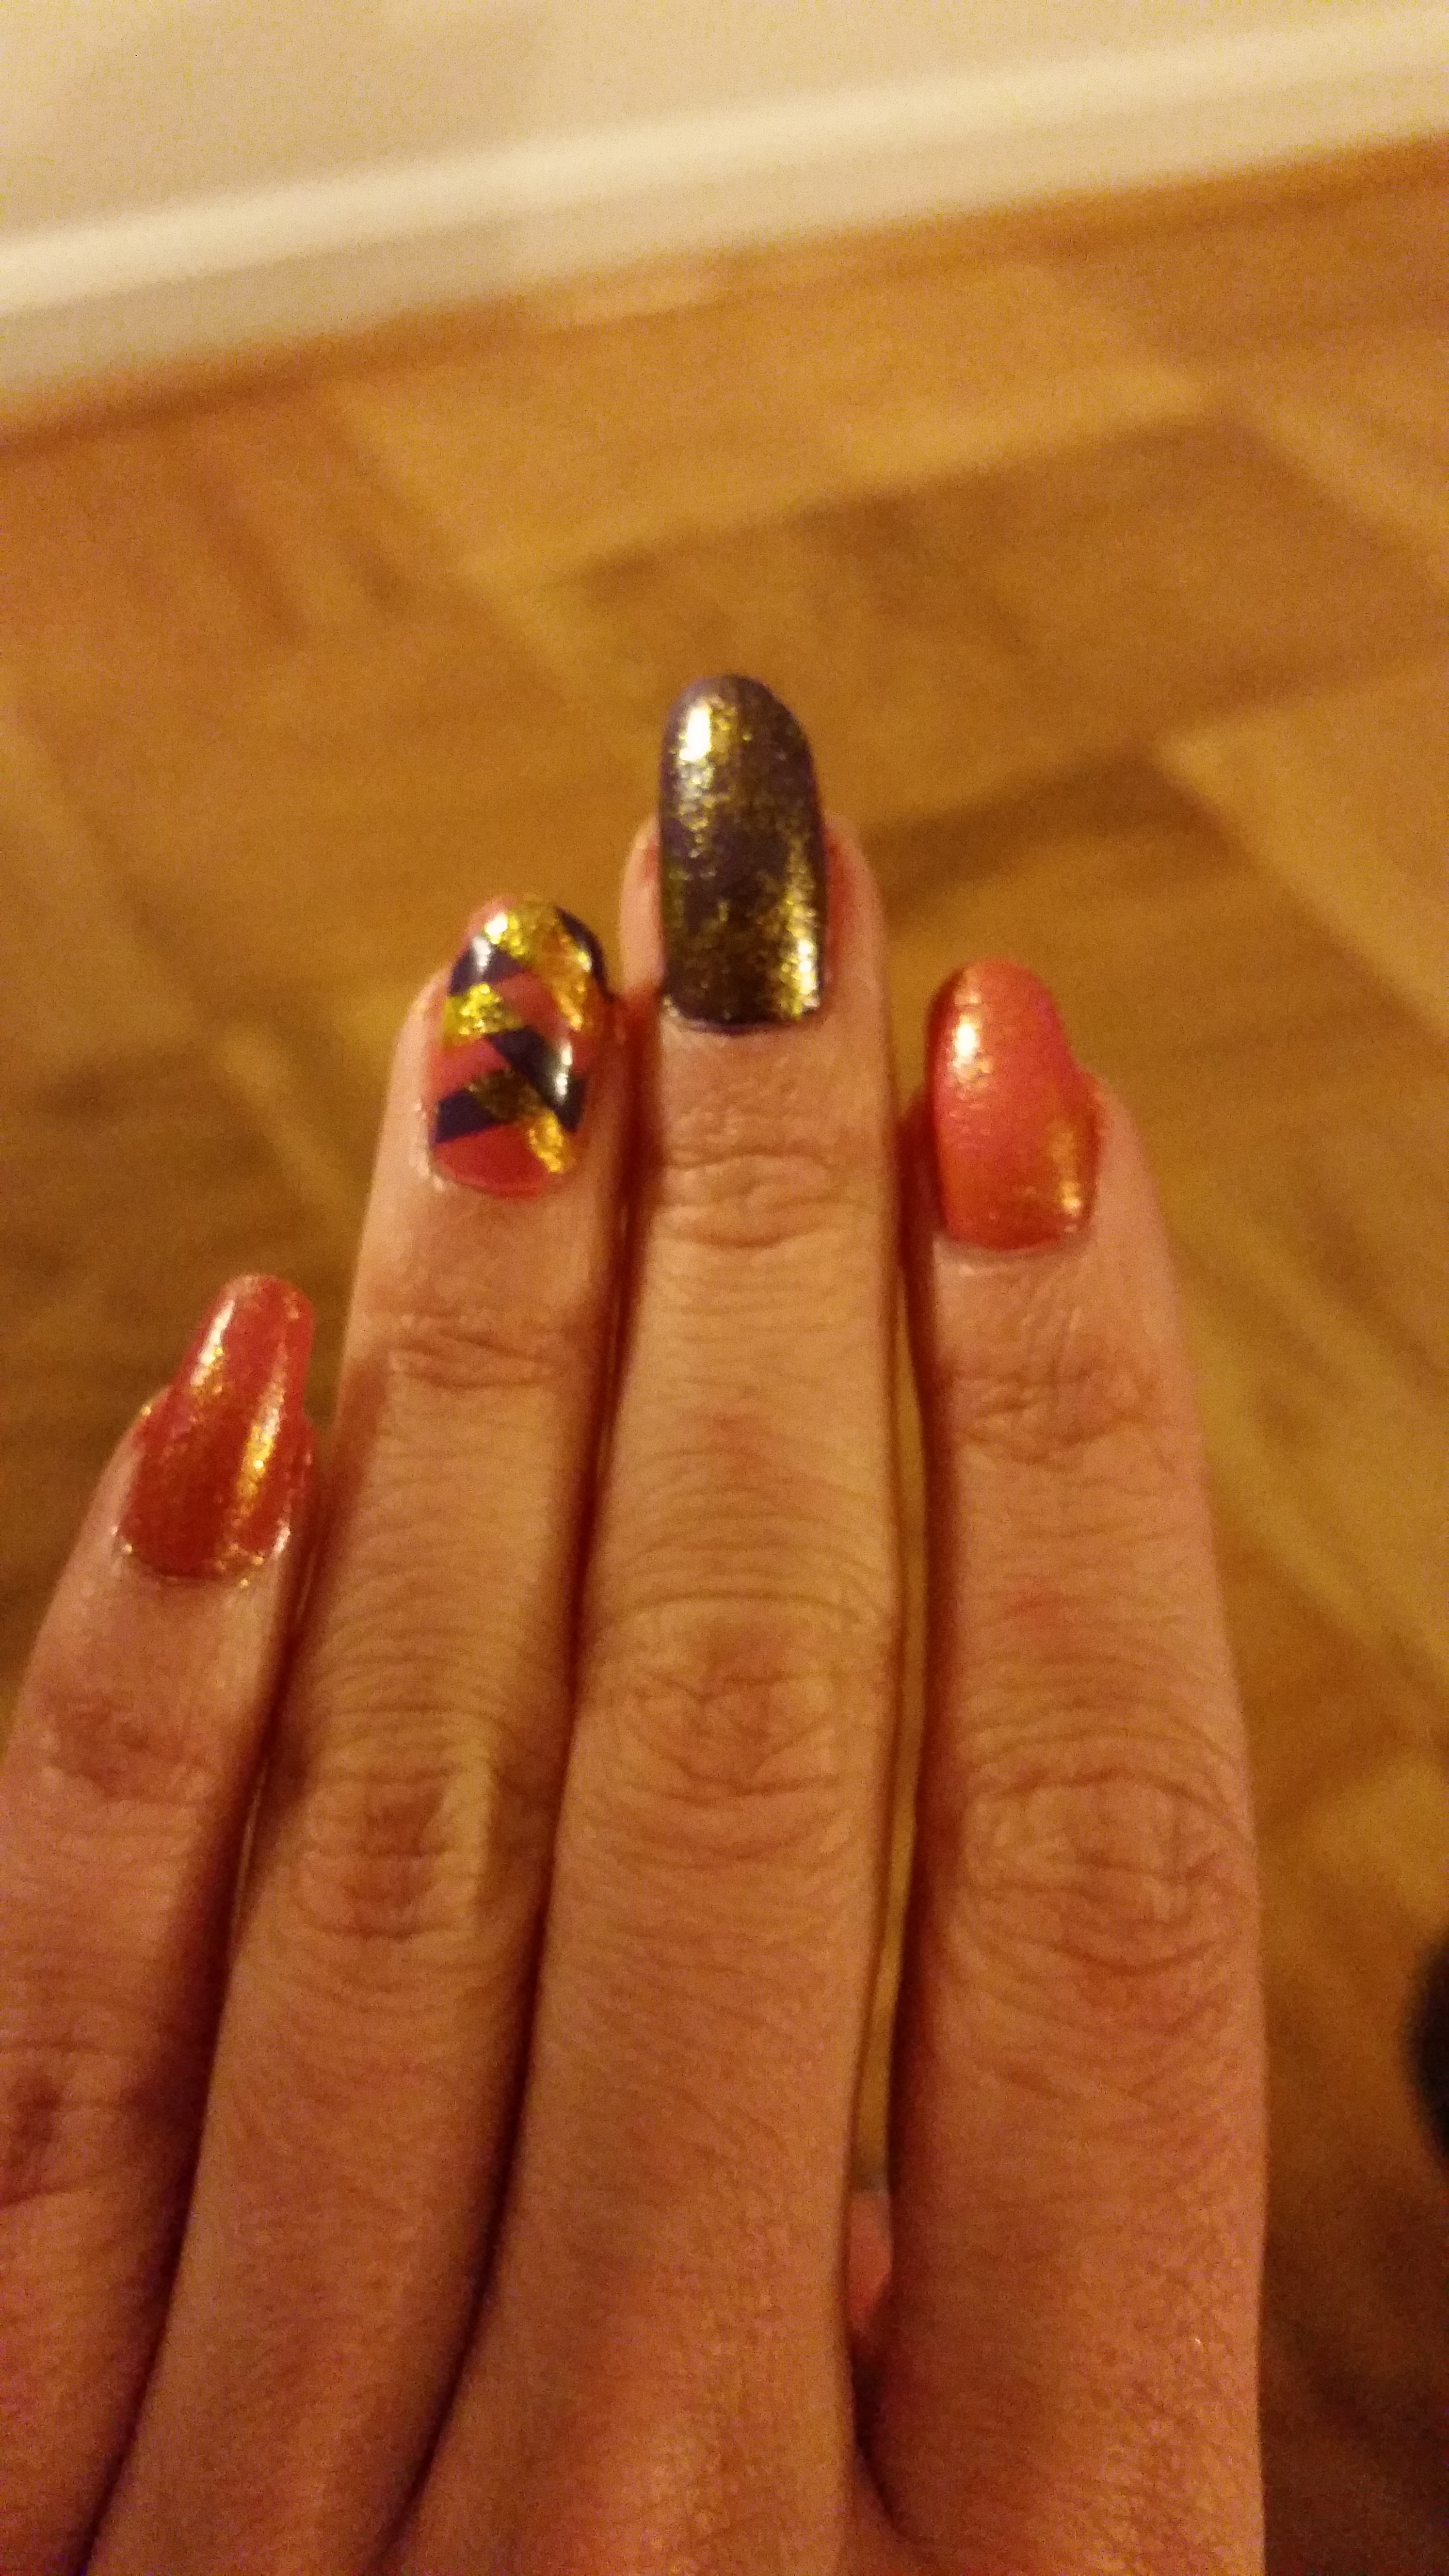
One of my most favorite designs is the braided nail. I will be very upfront, it takes a serious amount of time and a little bit of skill to make sure the braided pieces are evenly spaced. You can accomplish this with a nail polish brush that comes with the nail polish or a more rigid polish brush to get more even lines.
I’ve done this design with various color schemes. What you need to make sure of is that your three colors are as opaque as possible. If you have a color that’s translucent or a glitter base, the bottom colors will seep through and alter the glitter color. But, I always try to have a color that is not flat but has glitter or shimmer in it to introduce another dimension to the design.
For this design I used a purple, an orangey-pink, and a golden glitter. For this post I did the braided nails on only one finger and the other four fingers alternated orange and purple. You can do braiding on all nails, but quite honestly, it gets very busy and a challenge to paint and let dry.
So weaving a nail design like this is similar to braiding your hair. One stroke at a time. The major thing here is to let the stroke before dry fully before adding another layer.
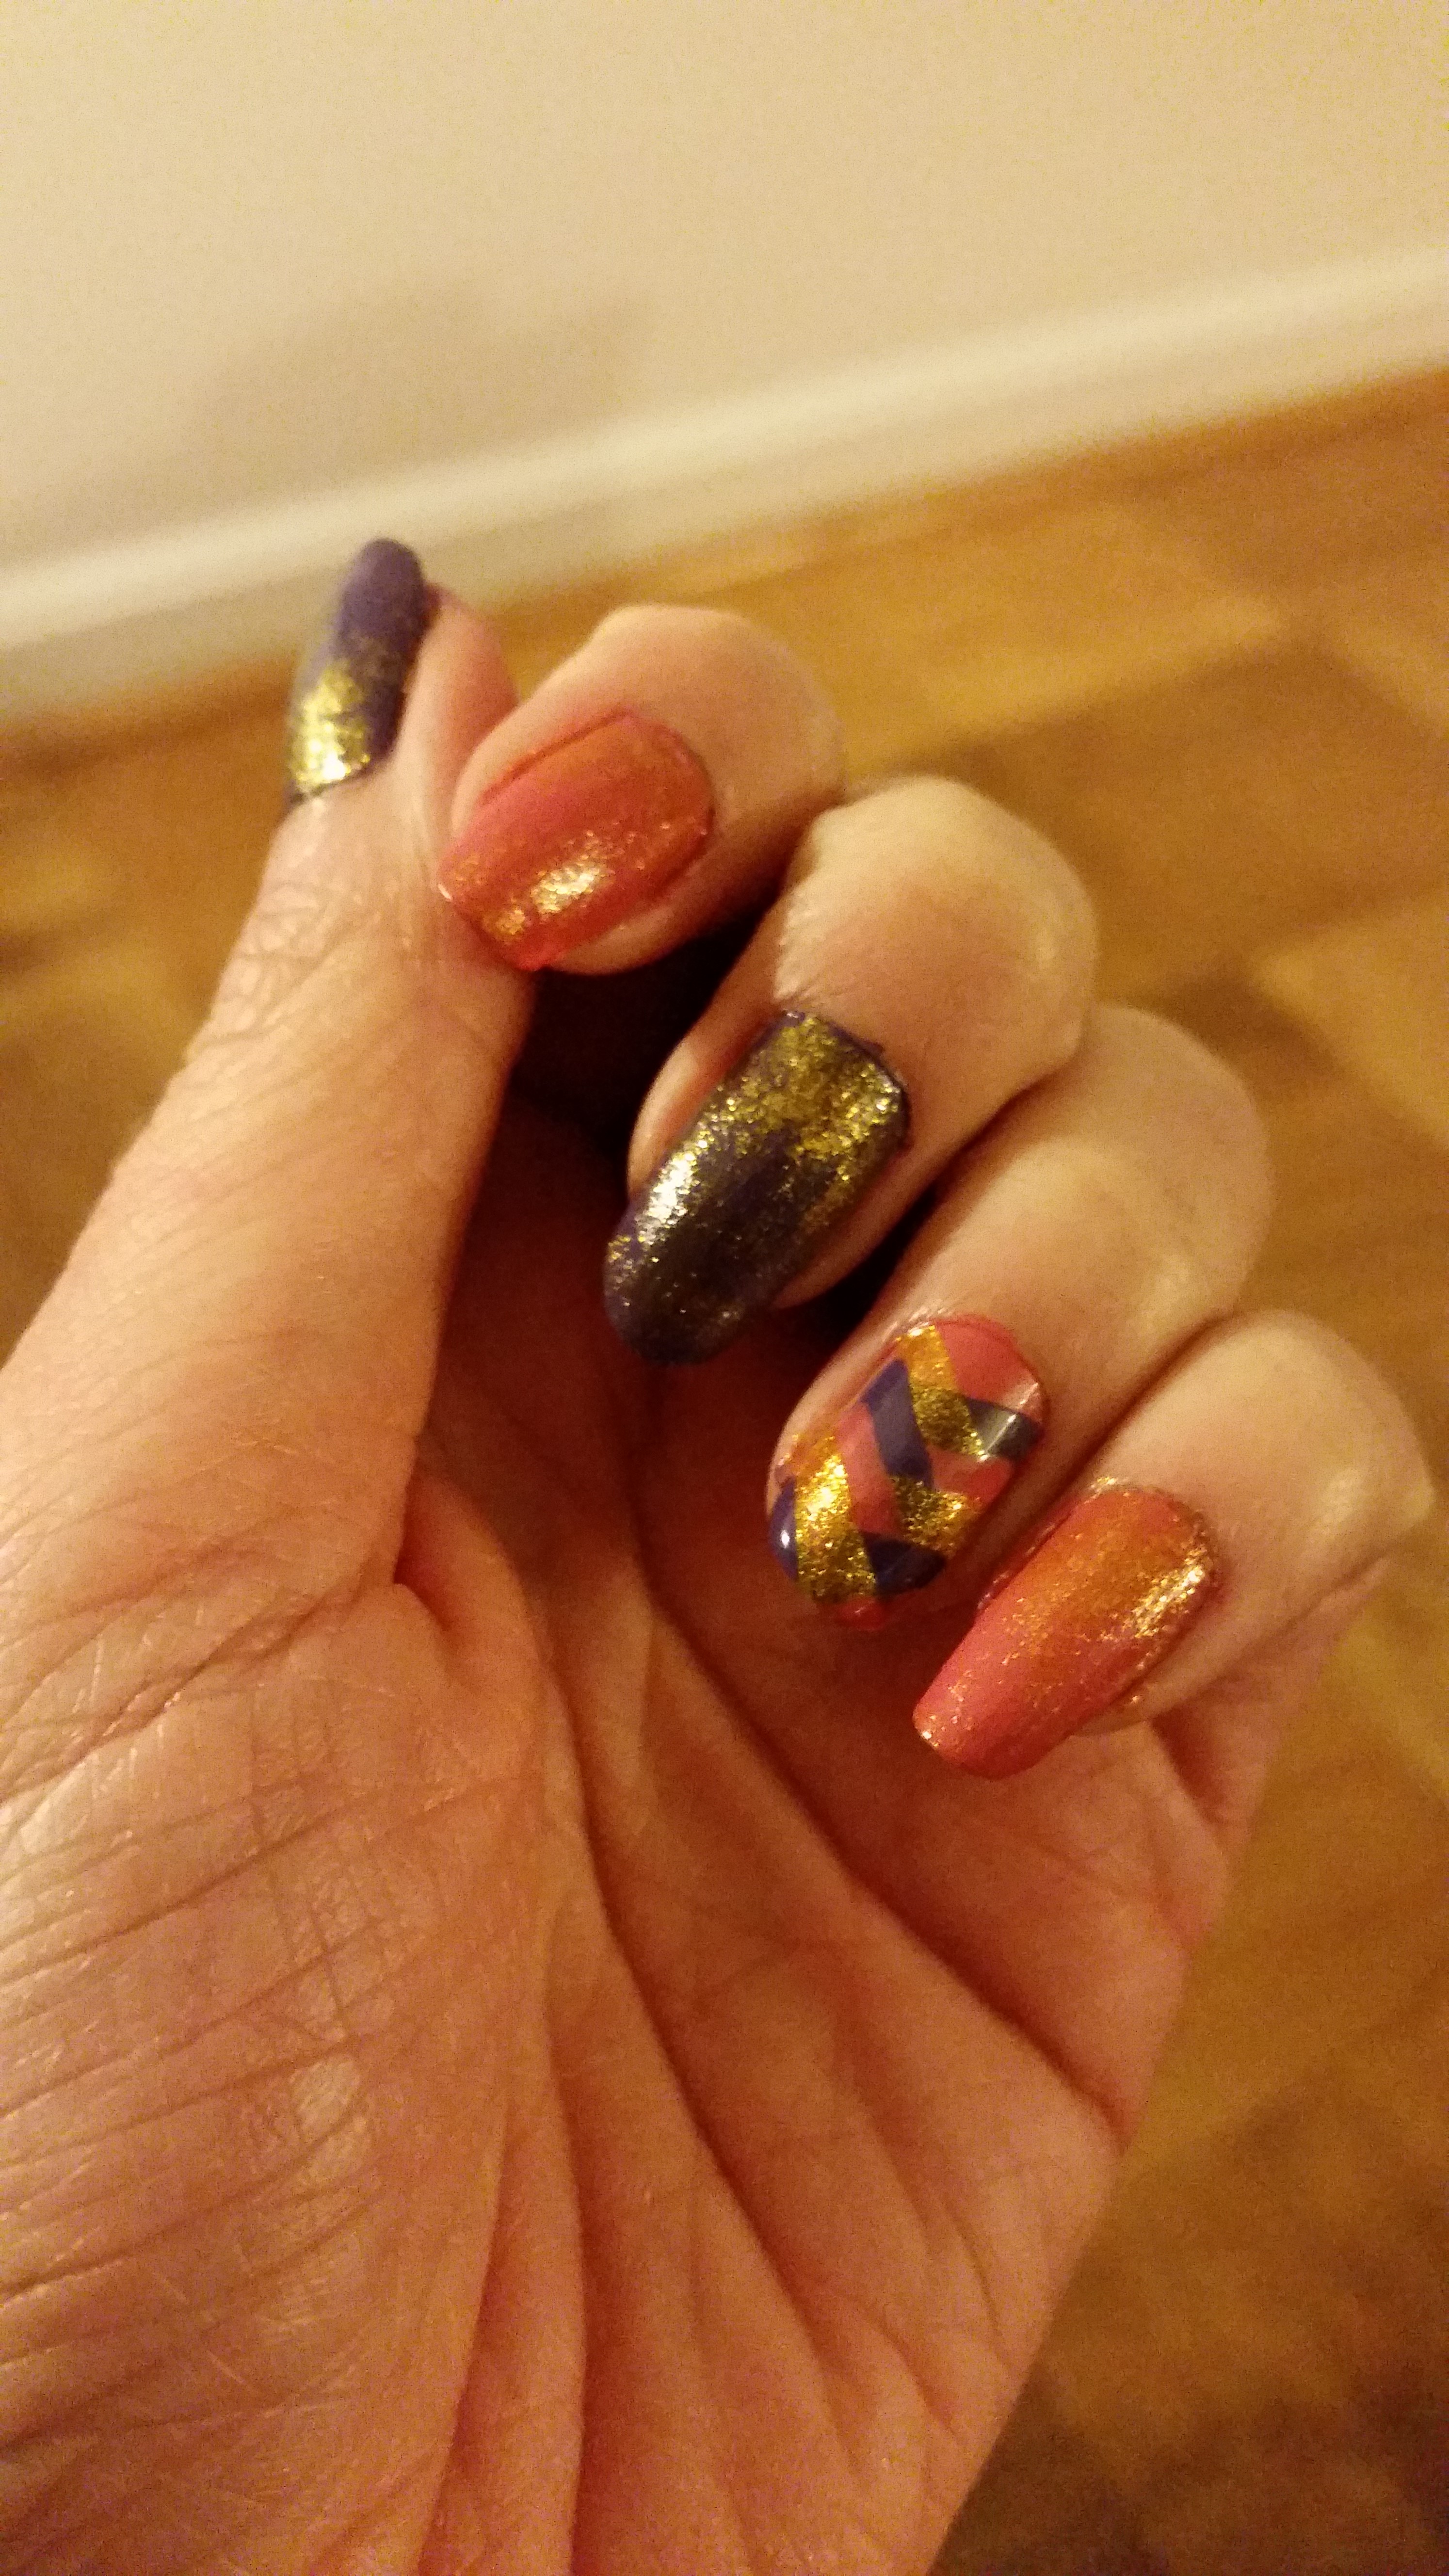
For an added dimension I also took the gold polish and lightly coated a single layer on the other four nails. Anyway, I love this design and could wear it every day with different schemes and never get tired of it. Hope you like it!