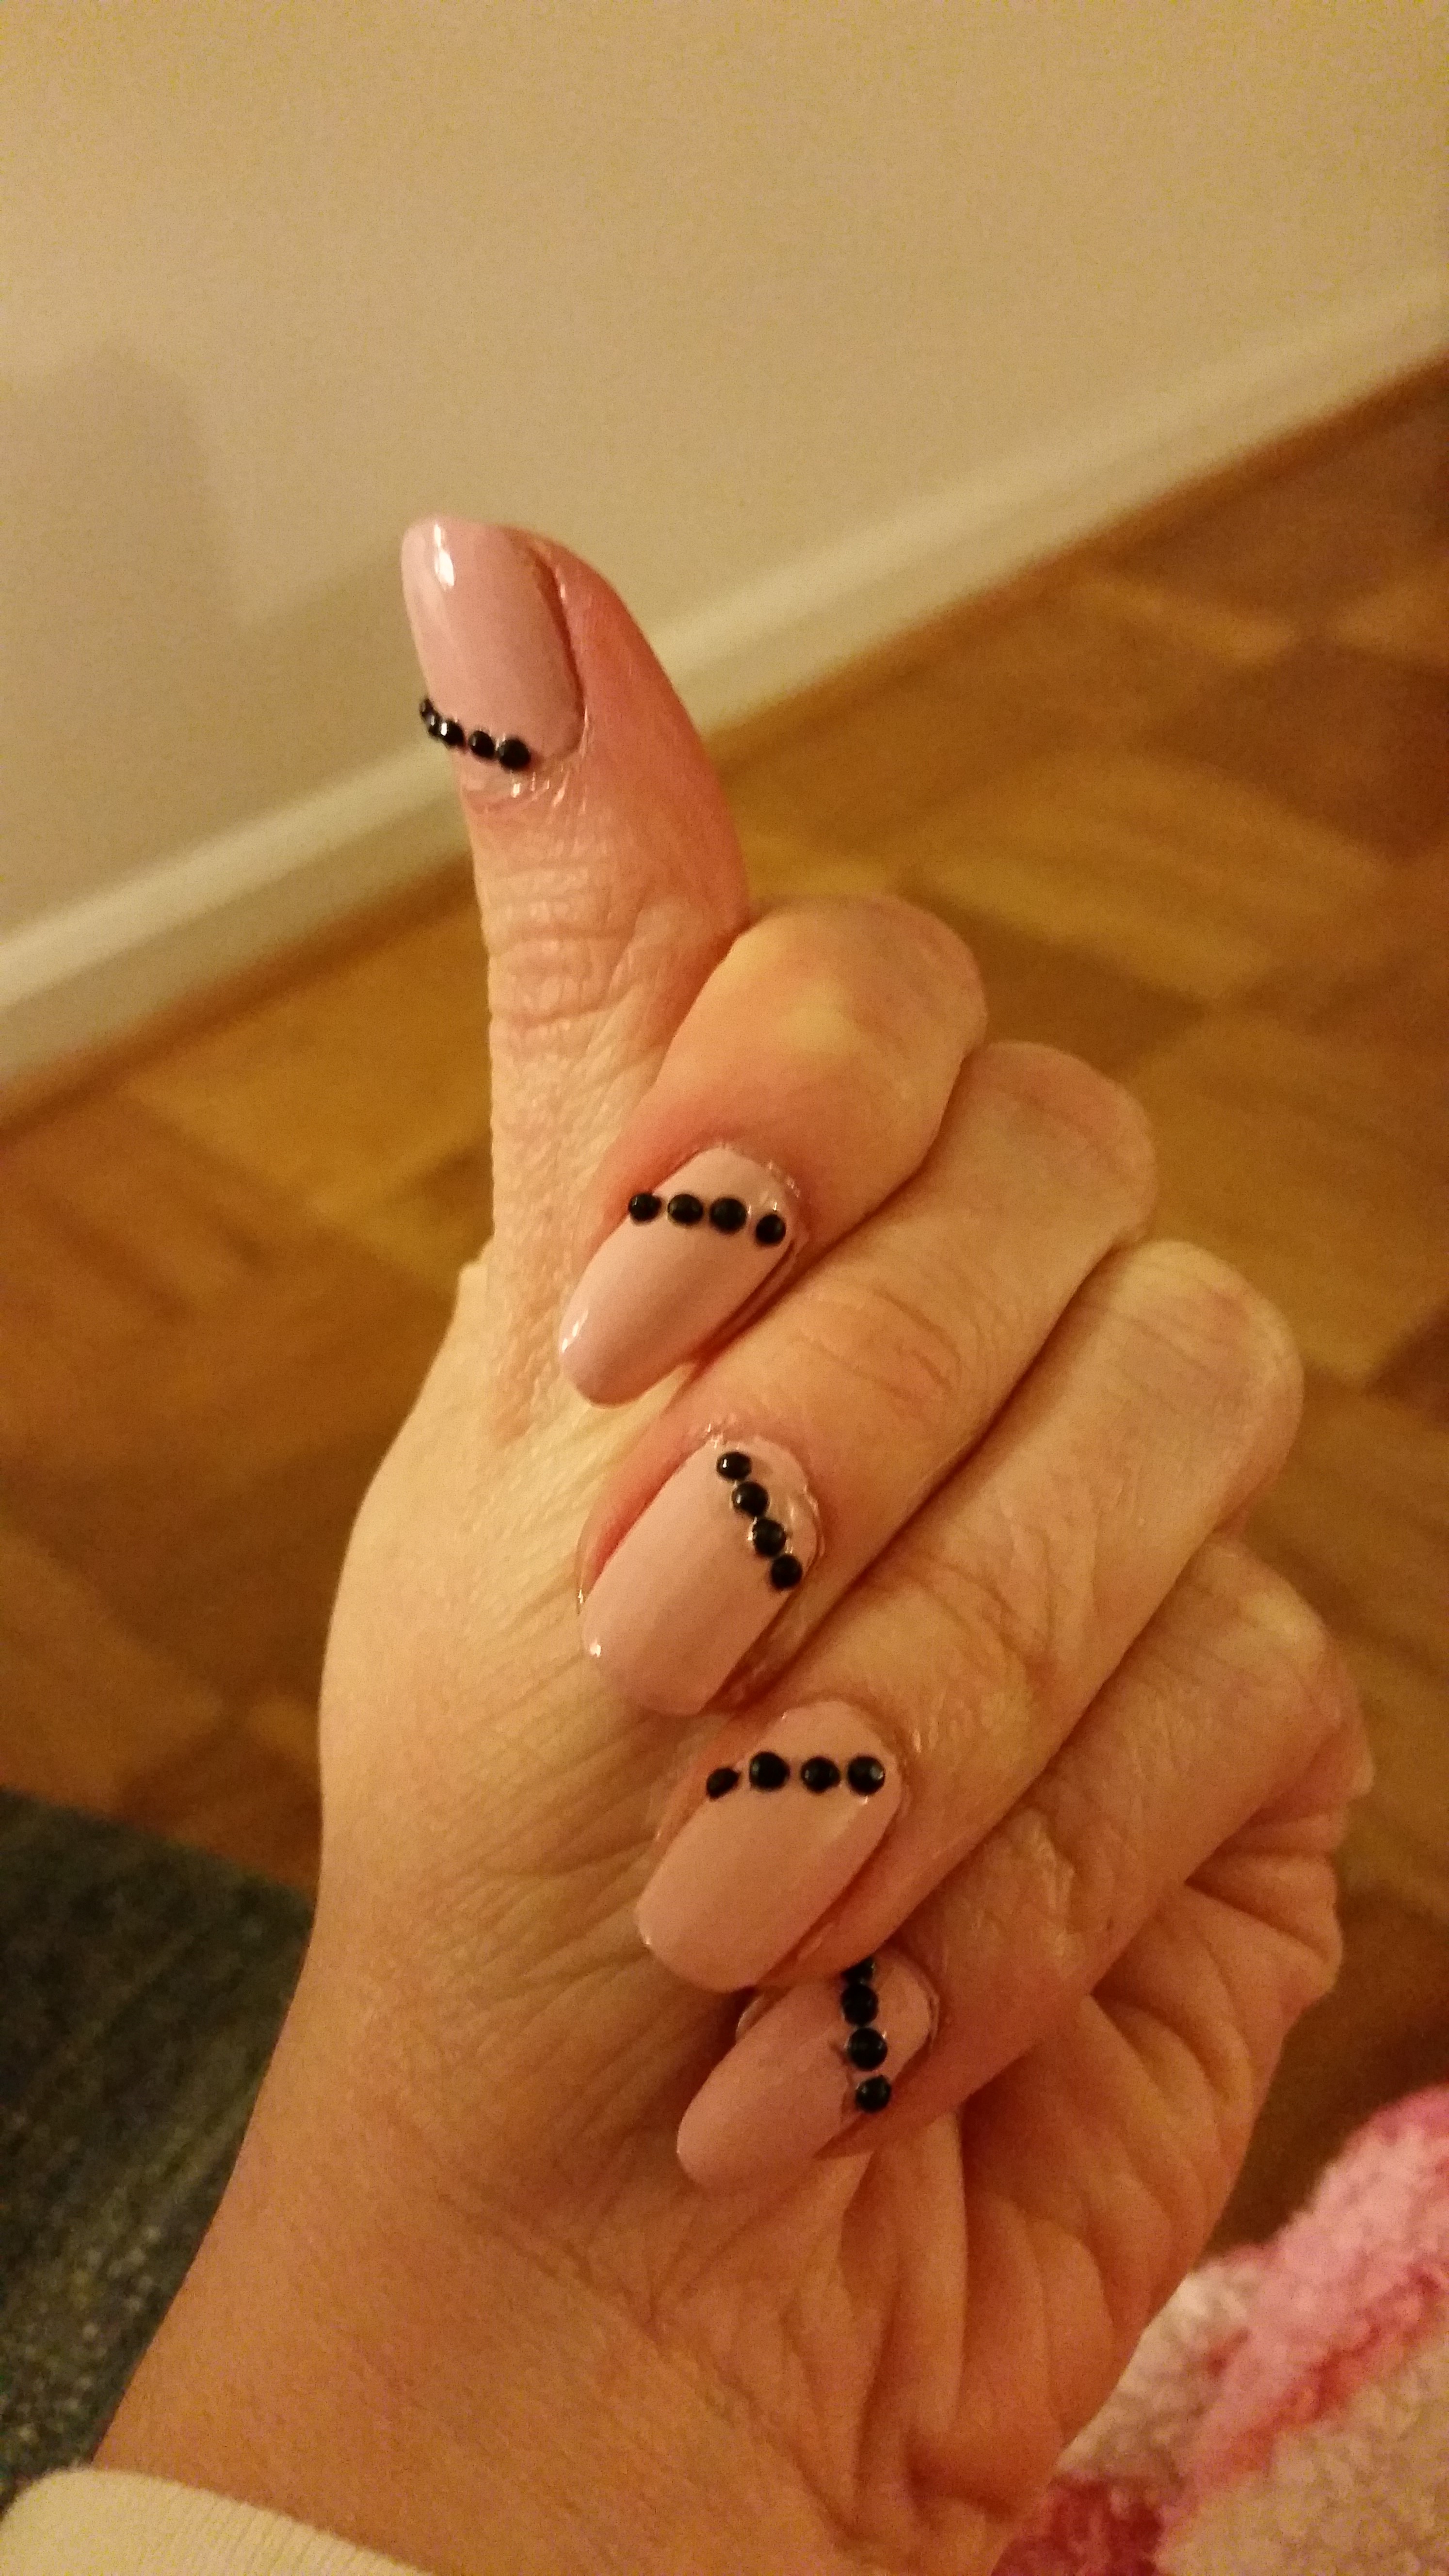
Some of the most simple nail designs are often times the best. This design in particular was a great hit, took a bit of time, but stayed for quite a few days without chipping. I was trying to juxtapose innocent pink with a bit of edge by incorporating the spiky black rhinestones. Again, very simple, however a lot of care must be taken on making the rhinestones appear in a line and at a similar angle to each other on the nail.
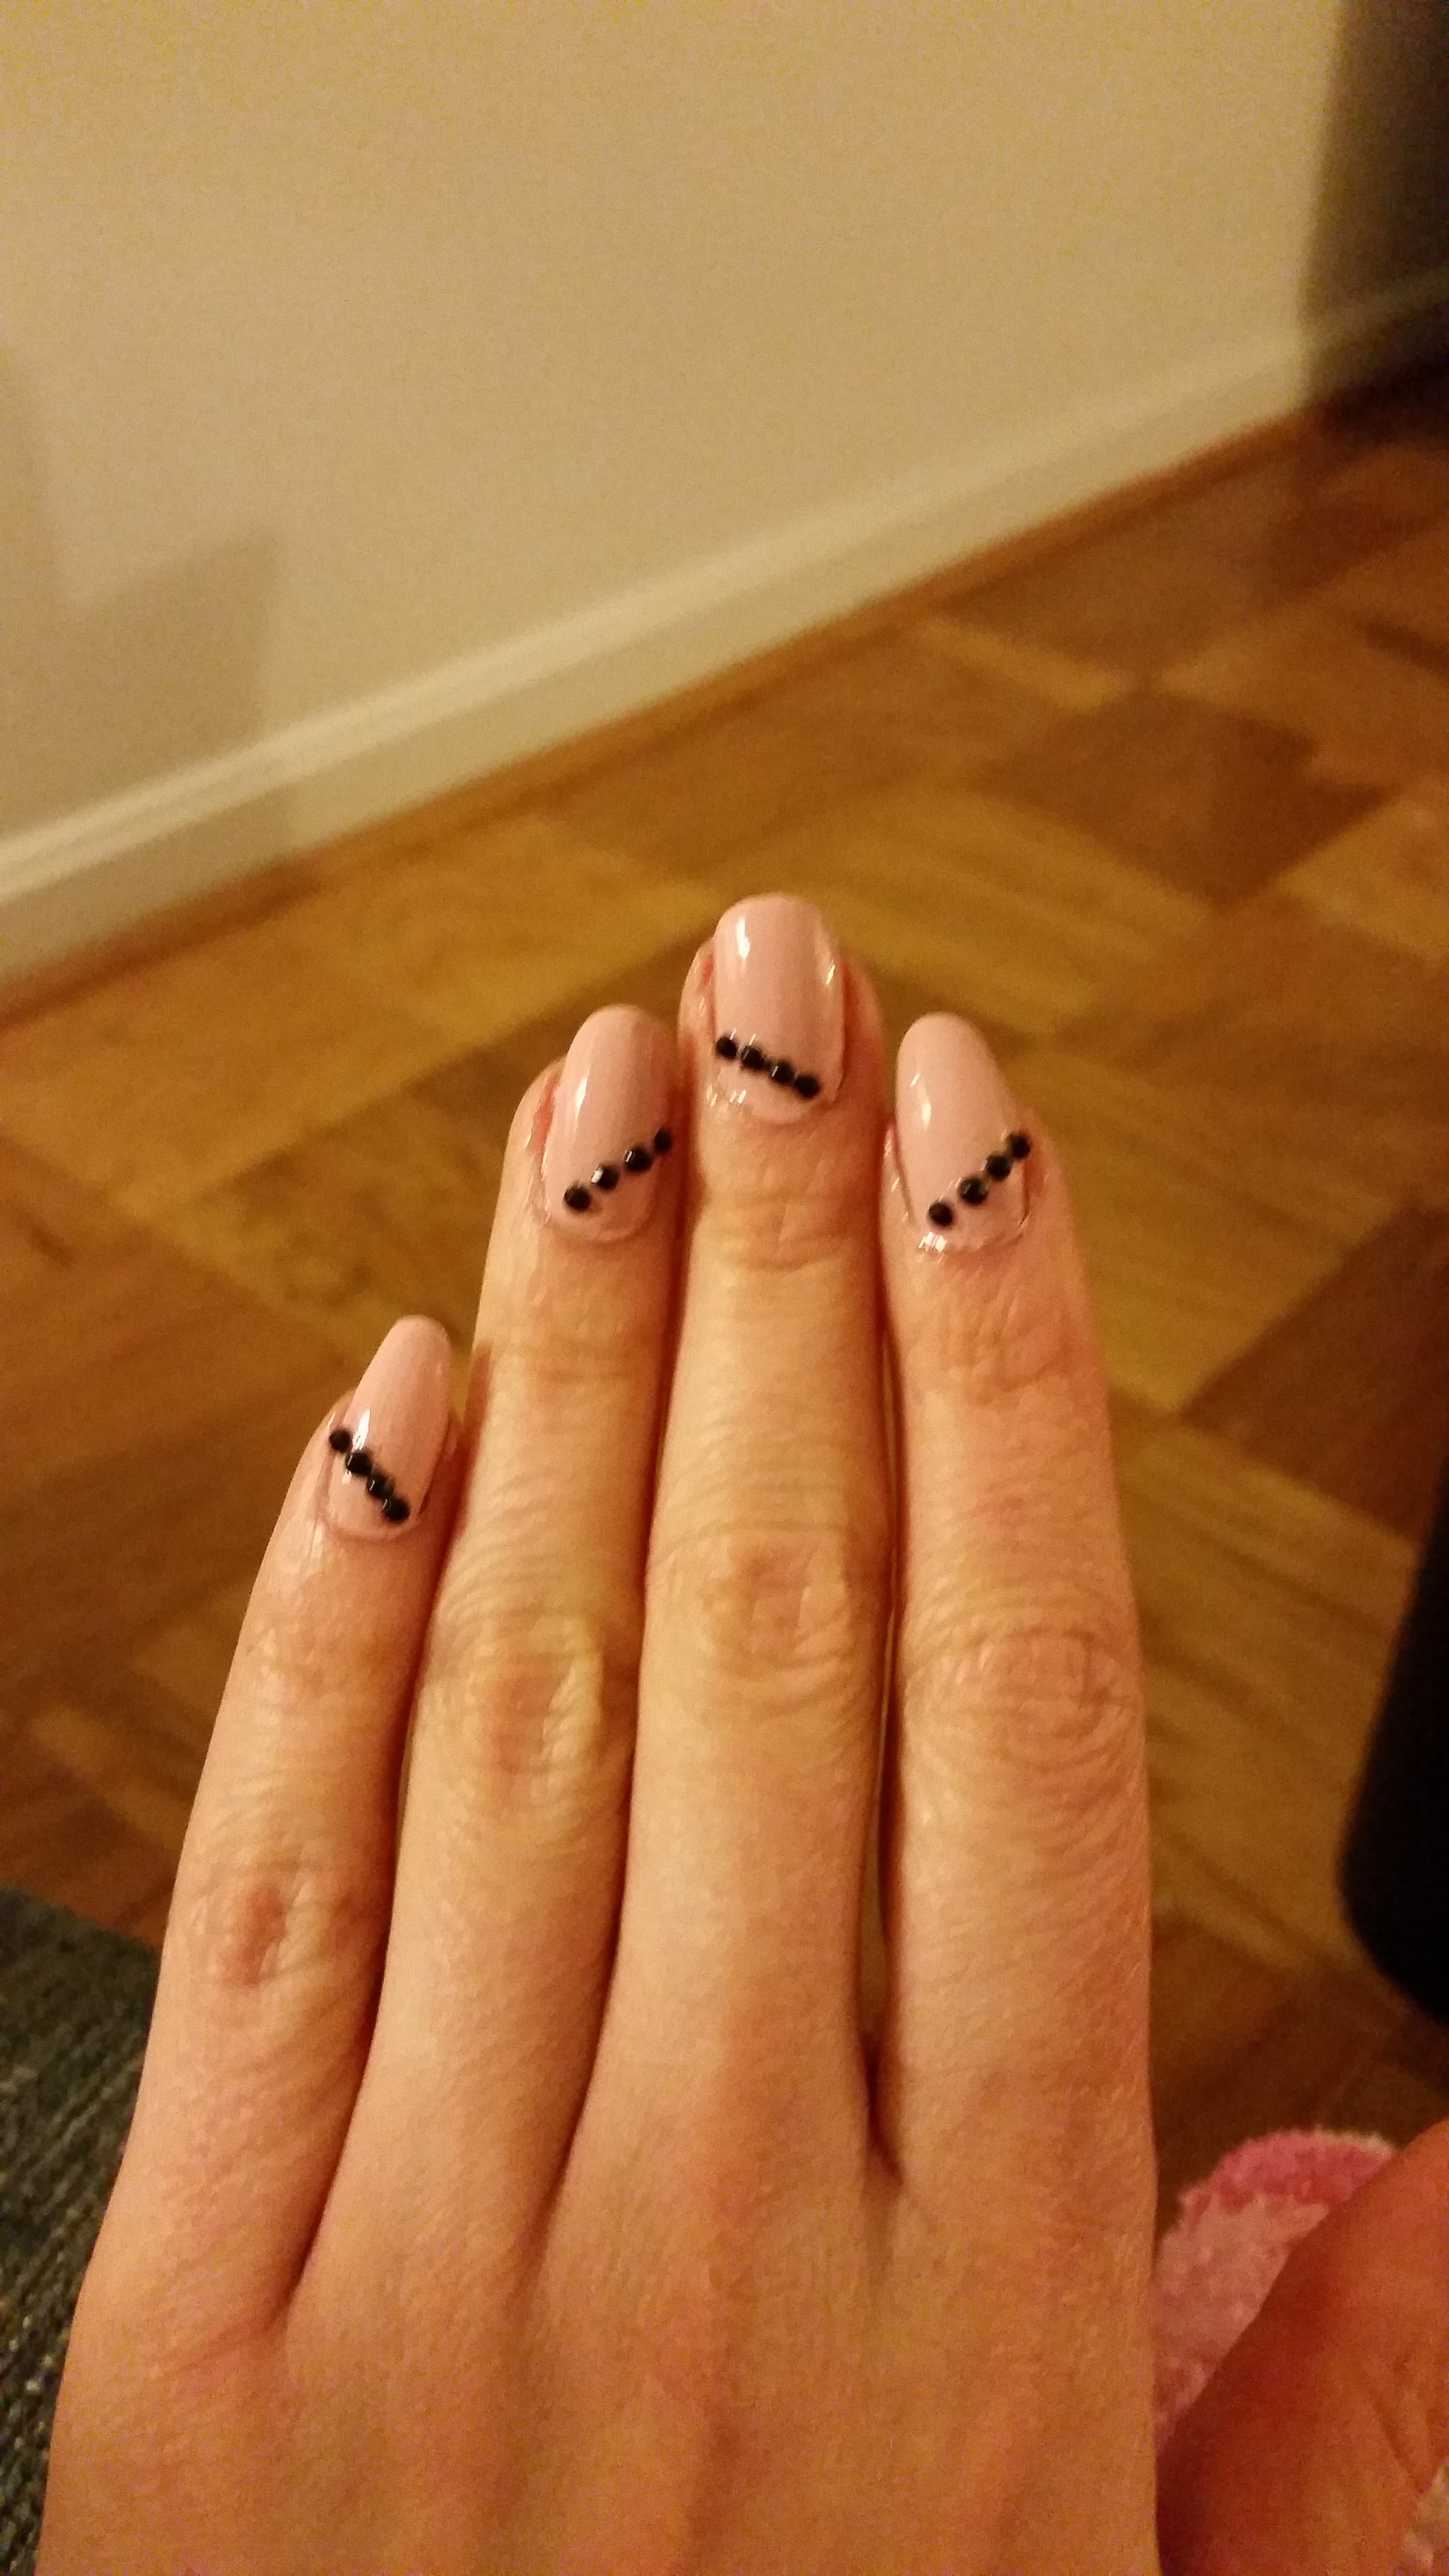
I first painted my nail a pale pink in two fairly thick, opaque coats. I poured my rhinestones into a small, wide open serving dish so that I could easily get access to them. I took a clear top coat and thickly put a layer of top coat in a line where I wanted to place the rhinestones. Then I quickly added each rhinestone and pressed it into the nail lacquer layers.
The most crucial step, other than getting all of the rhinestones in a line, was applying top coat. I put a layer of top coat around each rhinestone and over the pink of each nail. This really helped in keeping the rhinestones adhered to the nail for longer.
To remove these, I took out frustration on just chipping each rhinestone off. It was easy, and a bit of an anger outlet. Hope you enjoy!
